
Ok. Be forewarned, but please don't be intimidated. Brewing espresso is very technical and could possibly qualify as a dark art. The equipment demands are heavy and the costs will add up. Truthfully, if you're not planning on pulling at least a shot per day and a few on the weekend then it's best to leave this one to the professionals. But, if you think that you'll get some mileage out of an espresso machine then I'll briefly walk you through the main topics. Brewing espresso at home is a lot of fun so it's worth giving it a go if you have the resources and dedication.
Equipment: You have to start off with the right equipment if you want to have good espresso at home. Great espresso is possible, too, as well as professional milk steaming capabilities, if you get the right set-up. A descent home kit can be found for a little under $2K. Keep this old wisdom in mind when shopping for your kit; "You can make great espresso with a $1000 grinder and a $100 espresso machine, but you'll never make good espresso with a $1000 espresso machine and a $100 grinder." Basically, invest in a good grinder. If you have $1k budgeted for an espresso machine then plan on a grinder costing about half that. If you can't make it happen then get a cheaper machine, but don't skimp on the grinder. There's a good entry level espresso machine and grinder pair on the market made by Rancilio -- The Rancilio Silva and the Rancilio Rocky. Breville is making some quality prosumer grade equipment as well. If possible get a machine with PID and dual-boilers. The PID gives you accurate temperature control and stability while the dual boilers dedicate independent boilers for steaming and brewing (different temps). If you're really ballin' then I'd consider a La Marzocco Linea Mini with a Mazzer Lux D grinder. These machines are truly amazing replicas of a professional machine, they're just slightly slower at everything than a pro kit but the beverage quality is spot-on.
Moving on... We've spoken about the initial equipment out lay. Now you've got to track down a tamp pad to protect your counter tops, a knock box for your spent coffee pucks, tools to keep the machine clean, a steaming pitcher, tamper, scale, timer, etc. The La Marzocco Linea comes with a quality tamper and pitcher which kinda makes up for the hefty price tag. Once you track down all the equipment then you're ready to go. From here you just need some quality filtered water and fresh coffee beans.
Brewing Instructions:
Every machine will have its own operating instructions so this shall serve as a general guide to pulling quality shots.
Step 1. Warm the espresso machine as per manufactures recommendations. Warm the machine with the portafilter holder in place so that everything that touches the coffee is warm.
Step 2. Ensure that you have the desired size basket in your portafilter holder for the dose you intend to pull. Usually you'll have a choice of 14, 18, and 21 gram baskets. We use a 18 gram basket right now so I'll speak to those parameters, but keep in mind the general rule of thumb for espresso dosing is a ratio of 1 part ground coffee for every 2 parts of espresso produced in the cup. For example -- 18 grams of ground coffee makes 36 grams of coffee beverage. If you want a lesser volume shot then use less coffee to start, or adjust the ration to 1:1.5, etc. We'll talk more about grinding in a sec.
Step 3. Fill the hopper on your grinder with fresh coffee beans. You can either dump a whole bag in there; a couple handfuls; or exactly the amount of coffee you think you need for the drinks you plan to make in this session.
Step 4. Insure that the machine is fully heated, full of water (or plumed to your water supply) and everything is ready to go.
Step 5. Remove the portafilter holder and wipe inside the basket to ensure the basket is clean and dry.
Step 6. Purge the group head briefly on the espresso machine. No more than a couple seconds. This gets out old coffee left over from a previous session, or from the last shot pulled. Also, purging gets fresh water moving into the boiler and warm water moving through the machine.
Step 7. Grind the desired amount of coffee, 18 grams for us, into the portafilter. The grind should be the consistency of talcum powder. If you take a bit of the grinds and rub them between your finger they should fill your finger prints, and if you pinch a bit the grinds should adhere to one-another and "shape up". Espresso grind is very fine.
Step 8. Distribute the grinds in the basket evenly. There a few ways to do this, some better than others, but all methods achieve relatively the same results. I prefer to distribute the coffee using the thumb and index finger of my right hand while holding the portafilter in my left hand. Slowly take the mound of coffee in the filter and move it around so that the grinds fill in the voids evenly. You can also lightly tap the portafilter on the heal of your hand to distribute the grinds.
Step 9. At this point you're encouraged to check the weight of the coffee grinds that you've dispensed into the basket. To achieve this you'll want to weigh the empty portafilter and tare the scale prior to dispensing the grinds. Dispense to the desired quantity. Or, fill the portafilter basket to the top and level it off with your chosen method. When you tamp the puck you should see the line in the basket. Bed depth in the basket is very important and you'll want to get it right.
Step 10. While standing at the counter using your dominate hand grab the tamper like you would a door-knob. If you're holding the tamper with your right hand place your right hip slightly against the counter. Using your free hand move the portafilter into place on the tamp pad. Take the tamper and while using a fluid motion depress the tamper into the basket as straight as possible so as to create a flat surface on the puck. Push the tamper just to the point that you feel it somewhat pushing back. That's as far as you can go. Don't be tempted to tap the tamper agains the portafilter to get the little bits of coffee climbing up the basket down in the basket for a second tamp. It's not going to help, and it'll just make things worse. Tamp once and be done.
Step 11. Put the tamper down and with your empty hand wipe clean the top of the basket so that a good seal will be achieved against the group head gasket.
Step 12. Locate your timer, dispensing container, and scale. Reset the timer and tare the scale out with the empty demitasse glass or shot pitcher.
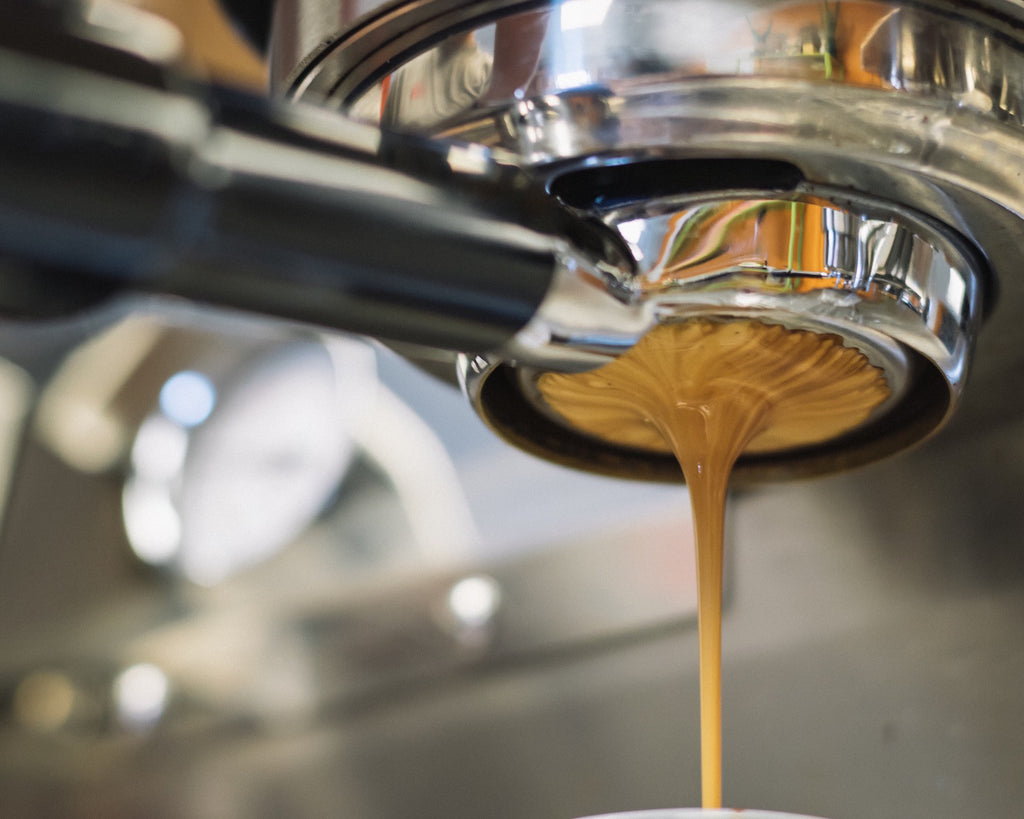
Step 13. Activate the dispensing action while starting the timer and watching the scale, if used.
Step 14. At 18 grams you'll be looking for 36 grams of espresso to be dispensed within 25-30 seconds. Any longer you'll get bitter flavors. Too short and the espresso might be sour and/or salty. Adjust your grind (dial in) to get the desired quantity in the appropriate time.
Step 15. Taste the coffee. If your spro was a face melter then AWESOME! You nailed it! If not then you'll likely need to make some adjustments. Go to step 16.
Step 16. This is where the dark art comes into play. Continue adjusting the grind and dose to get it within the 25-30 seconds, or whatever tastes best. What's good for one machine and one bean in certain climate one day may not be good the next day for the same bean. Imagine the difficulty when changing beans constantly. After a while though the "dial in" will be much easier.
This brew guide is meant to be an open-ended starting point for discussion. We'd love to hear your thoughtful input. You're welcome to share your own recipes, too.
Leave a comment